IT: Whiteboard Technologies

The ability to collaborate, annotate, and share visual imagery through some form of whiteboard technology is an important component of your online teaching toolkit. At the Cooper Union, you have several options for using digital whiteboard technology for teaching.
Teams’ Internal Whiteboard: Microsoft Whiteboard is a free-form, digital canvas and is called MS Teams Whiteboard. Whiteboard integration in Microsoft Teams allows Teams meeting participants draw, sketch, and write together on a shared digital canvas. Here's a tutorial on how to use the whiteboard feature in Teams.
Drawing on a PowerPoint: When you're showing a presentation, you can draw onscreen with a digital pen to emphasize a point or show connections. Here is a quick how-to guide.
Zoom Whiteboard: Zoom has an internal whiteboard feature with a very nice set of annotation tools in all of its subscription types. In Zoom you can only see one frame at a time, so that can be limiting in a classroom where a professor wants all eyes on multiple projects. Here is a good tutorial on the built-in whiteboard features of Zoom.
Miro: Miro is a collaborative, web-based whiteboard platform. Its key feature is an unlimited, freeform, zoomable canvas that allows quick toggling between student projects. The Education Plan allows for high-resolution output and saving directly to One Drive. You can connect Miro to Teams, and soon it will be integrated with Zoom. For information on how to acquire an Education Plan license, see below.
Document Camera: These are a bit like an old-fashioned overhead projector, only digital. When using a document camera, an instructor can draw or write on a piece of paper and the camera captures that in real time. The downside to this method is that the pieces of paper would need to be scanned if it is to be documented and shared with students learning asynchronously. Cooper has a limited number of document cameras for use on an as-needed basis. It is also possible to set up your own mobile phone or iPad as a document camera. You can request help with a document camera setup at Distance Learning Equipment Needs.
How to Get a Miro Education Account
1) Apply for an education plan license using your cooper.edu email address. You may use this address even if you already had a free Miro account that was created with that same address. If you reapply, Miro will update your free account.
-
Apply for Education License: https://miro.com/education-whiteboard/
-
You will need a Scan or photo of your Cooper ID for upload.
-
You will need to take a screenshot of Cooper’s accreditation page.
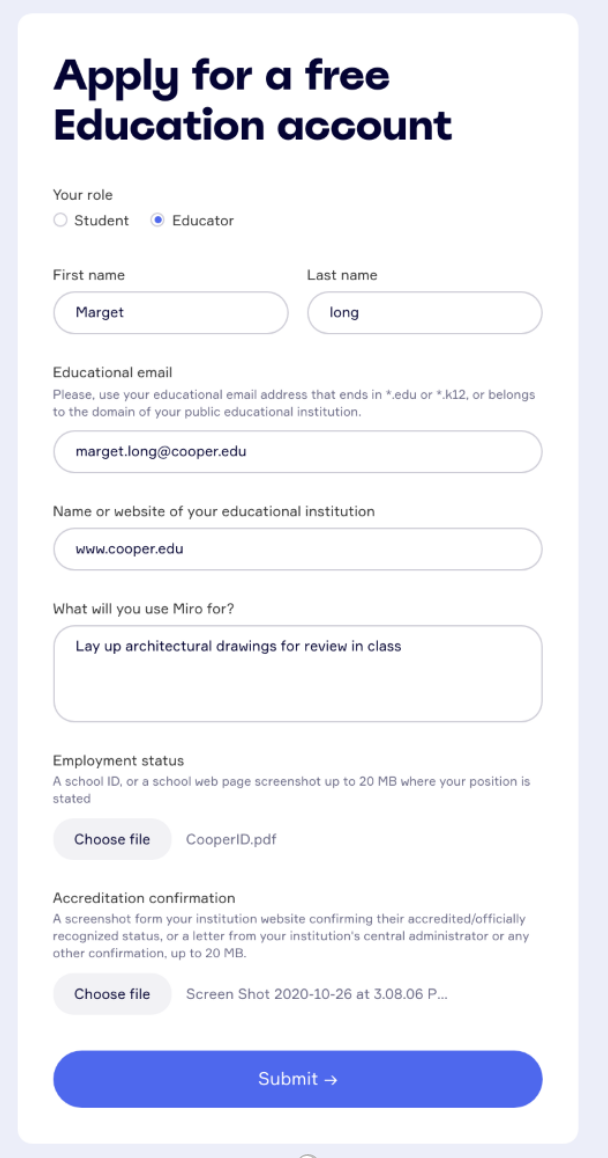
2) Miro will usually process your request in about 24 hours, and you will receive an email once the account is set up. When you go to your Team profile, you will see that you are now enrolled in the Education Plan and your pre-existing boards, if you had any, should still be visible when you log in.
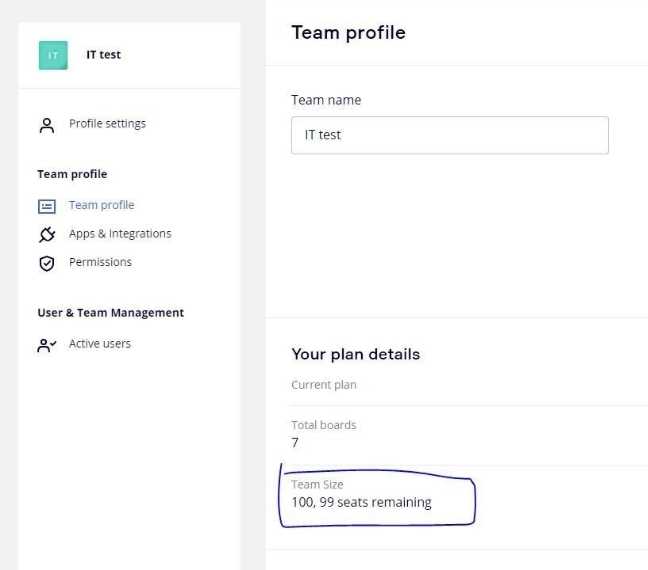
Video Tutorials for New Users
How to Connect Miro with Teams
The Miro plugin for Microsoft Teams allows you to get Miro notifications (such as new comments and mentions, any projects or team activities) and embed Miro boards into MS Teams channels. This ensures that your entire team is on the same page and helps you keep track of Miro activities in Microsoft Teams. To add the Miro plugin to Teams please follow the steps outlined here.
How to Use Miro with Zoom
Simply share your screen from Zoom as you normally would and have Miro open on any web browser. To remain FERPA complaint, you will need to back up student work to One Drive, see below.
How to Back up to One Drive for FERPA Compliance
*Required of all faculty for FERPA compliance
For Cooper to remain FERPA complaint, we ask that you install One Drive to Miro and back up you boards several times a semester.
To install, go to your Miro Dashboard and click on your Profile (your initials in the circle). That will open a window where you can select “Apps & Integration.”
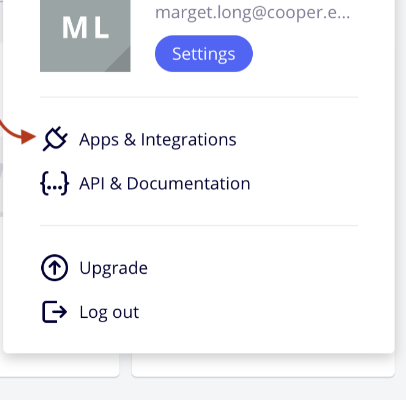
When the Marketplace window opens, select “File Storage” under the “Type of Tools” category. One Drive will now be available for you to install for backup. For further information on One Drive and Miro integration, go here.
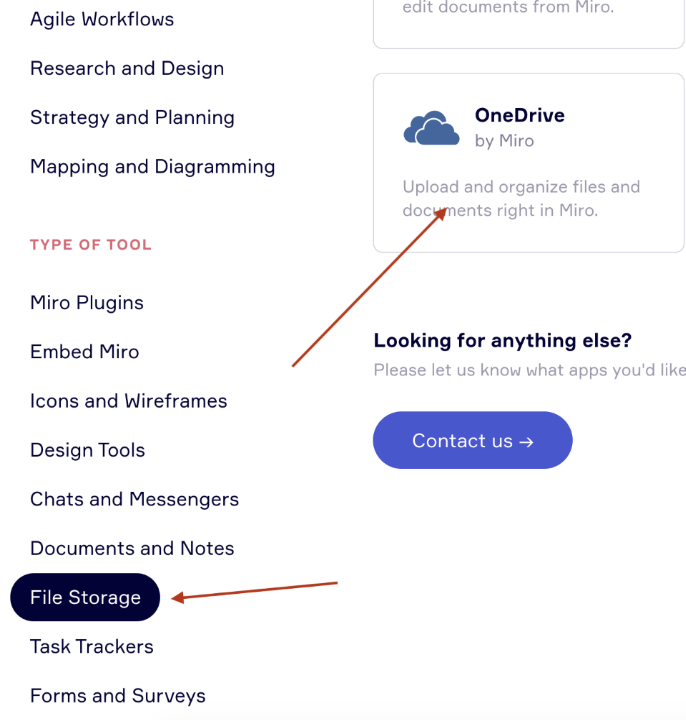
Once you’ve installed One Drive, you will be able to back up student work by uploading to One Drive.
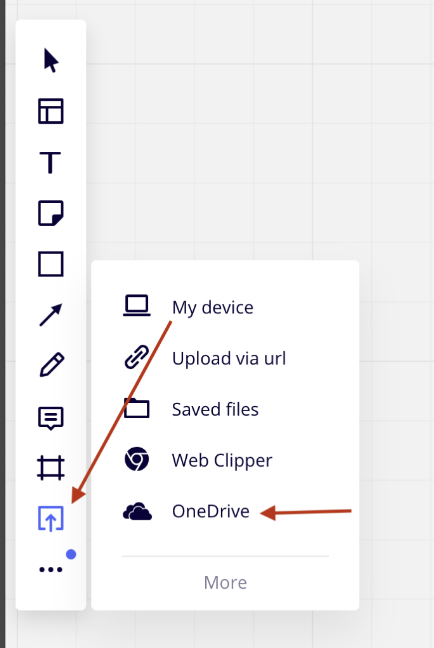
How to set up Miro Education if you teach multiple classes
Since Miro Education provides each account with only one Team, you will need to use separate Projects if you teach more than one class. Board management can get unwieldy unless you organize your account before the semester begins. Here is the recommended set up.
How to Install Adobe Creative Cloud Plugin
Integration with Adobe® Creative Cloud™ allows you to upload files from your Creative Cloud account and add them to your boards for further consideration and collaboration. You can hold a discussion on the board, outline feedback right on top of your projects, mention colleagues and, overall, iterate faster.
⚠️ Non-admin users can't install the app if it's not allowed in the Apps & Integrations settings.
There're 2 ways you can install the app.
1) Go to the Marketplace, find Adobe Creative Cloud and click Get App.

Adobe CC plugin in Miro Marketplace
Choose a team you'd like to install the app for - and that's it! The app is installed.
For detailed information on how to install or use the Adobe CC integration, go here.


